
配置指导:OpenStack-Helm部署-AIO模式
1 目标
本文档以Ubuntu 18为基础操作环境,简要介绍OpenStack-Helm项目的基本概念,以及以All in one模式部署的具体方法。
2 概要介绍
OpenStack项目各组件本已纷繁复杂,再使用Kubernetes去部署承载OpenStack的各组件就更加复杂了。而Helm最大的优势就是对Kubernetes复杂应用的管理,Helm就相当于Linux的包管理工具YUM,只是它管理的“程序包”是一些互相耦合、打包后的YAML配置文件与资源文件。使用一个更容理解的类比,即在Kubernetes中使用Helm来部署管理Chart,就相当于在安卓手机中使用应用商店来安装管理APP。
Helm相关组件、概念以及原理:
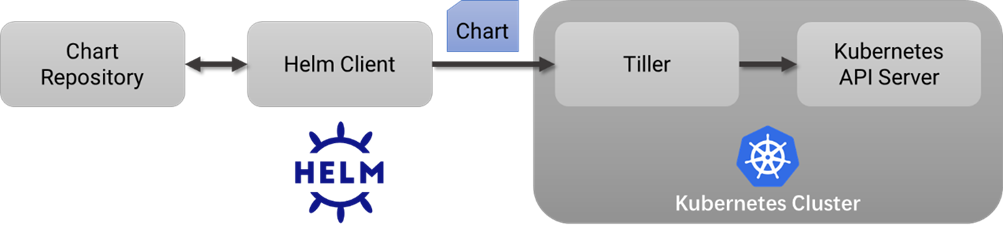
Helm包含两个重要组件,分别是Helm客户端和Tiller服务器。
- Helm:是一个命令行工具,用于本地开发及管理Chart、Chart仓库等;
- Tiller:是Helm的服务端。Tiller负责接收Helm的请求,与K8S的 APIServer进行交互,根据Chart来生成 Release并管理Release的整个生命周期;
- Chart:Helm的打包格式叫做Chart,所谓Chart就是一系列配置文件, 它描述了一组相关的K8S集群资源;
- Release:使用helm install命令在Kubernetes集群中部署的Chart称为Release;
- Repoistory:Helm Chart的仓库,Helm客户端通过HTTP协议来访问仓库中Chart的索引文件和压缩包。
下图描述了Helm的几个关键组件Helm、Tiller、Repository、Chart之间的关系以及它们之间的工作流程。
OpenStack-Helm这个项目最主要的工作就是进行OpenStack各组件的Chart开发,将各个组件封装为不同的Chart,在运维OpenStack的过程中,不再管理具体的程序进程、容器或者是K8S的Pod,而是直接管理更粗粒度的Release,以尽可能降低OpenStack在K8S上的部署、运维的复杂度。
3 环境准备
3.1 系统版本
- 操作系统:Ubuntu 18.04.5 LTS (bionic);
3.2 节点配置与部署模式
| 主机名 | IP地址 | 处理器 | 内存 | 硬盘 | 节点角色 |
| noone-virtual-machine | 192.168.2.233 管理口 | 16C | 32G | 200G 系统盘 | All in one |
为了OpenStack-Helm项目的快速部署、验证与研究,本次部署采用AIO(All in one)模式,因此需要注意的是,若要安装所有的功能模块至少保证服务器的内存资源不小于16G,否则可能会导致部署失败。
3.3 实施部署前的环境准备
进行实施部署前的环境准备工作,包括系统基础环境和网络代理配置。
- 配置Sudo免密:
noone@noone-virtual-machine:~$ chmod +w /etc/sudoers
noone@noone-virtual-machine:~$ sudo vim /etc/sudoers
noone@noone-virtual-machine:~$ sudo cat /etc/sudoers
#
# This file MUST be edited with the 'visudo' command as root.
#
# Please consider adding local content in /etc/sudoers.d/ instead of
# directly modifying this file.
#
# See the man page for details on how to write a sudoers file.
#
Defaults	env_reset
Defaults	mail_badpass
Defaults	secure_path="/usr/local/sbin:/usr/local/bin:/usr/sbin:/usr/bin:/sbin:/bin:/snap/bin"

# Host alias specification

# User alias specification

# Cmnd alias specification

# User privilege specification
root	ALL=(ALL:ALL) ALL

# Members of the admin group may gain root privileges
%admin ALL=(ALL) ALL

# Allow members of group sudo to execute any command
%sudo	ALL=(ALL:ALL) ALL

# See sudoers(5) for more information on "#include" directives:
noone	ALL=(ALL) NOPASSWD:ALL

#includedir /etc/sudoers.d
noone@noone-virtual-machine:~$
- 配置Ubuntu的软件源列表、更新系统中的软件包:
noone@noone-virtual-machine:~$ cd /etc/apt/
noone@noone-virtual-machine:/etc/apt$ cat sources.list
deb http://mirrors.163.com/ubuntu/ bionic main restricted universe multiverse
deb http://mirrors.163.com/ubuntu/ bionic-security main restricted universe multiverse
deb http://mirrors.163.com/ubuntu/ bionic-updates main restricted universe multiverse
deb http://mirrors.163.com/ubuntu/ bionic-proposed main restricted universe multiverse
deb http://mirrors.163.com/ubuntu/ bionic-backports main restricted universe multiverse
deb-src http://mirrors.163.com/ubuntu/ bionic main restricted universe multiverse
deb-src http://mirrors.163.com/ubuntu/ bionic-security main restricted universe multiverse
deb-src http://mirrors.163.com/ubuntu/ bionic-updates main restricted universe multiverse
deb-src http://mirrors.163.com/ubuntu/ bionic-proposed main restricted universe multiverse
deb-src http://mirrors.163.com/ubuntu/ bionic-backports main restricted universe multiverse
noone@noone-virtual-machine:/etc/apt$ sudo apt update
noone@noone-virtual-machine:/etc/apt$ sudo apt upgrade
- 安装Git工具,拉取项目文件:
noone@noone-virtual-machine:~$ mkdir openstack
noone@noone-virtual-machine:~/openstack$ sudo apt-get install git
noone@noone-virtual-machine:~/openstack$ vim git-clone-helm.sh
noone@noone-virtual-machine:~/openstack$ cat git-clone-helm.sh
#!/bin/bash
set -xe

git clone https://opendev.org/openstack/openstack-helm-infra.git
git clone https://opendev.org/openstack/openstack-helm.git
noone@noone-virtual-machine:~/openstack$ bash git-clone-helm.sh
- 安装配置代理工具,用于代理终端命令行工具产生的流量(Docker镜像拉取):
安装代理软件:
noone@noone-virtual-machine:~$ sudo apt install privoxy编辑代理软件的配置文件:
noone@noone-virtual-machine:~$ sudo vim /etc/privoxy/config
......
#      Suppose you are running Privoxy on an IPv6-capable machine and
#      you want it to listen on the IPv6 address of the loopback
#      device:
#
#        listen-address [::1]:8118
#
listen-address  127.0.0.1:8118
listen-address  [::1]:8118
#
......
#      To chain Privoxy and Tor, both running on the same system, you
#      would use something like:
#
#        forward-socks5t   /               127.0.0.1:9050 .
#
注释:
此处的配置,将本地转发到8118端口的流量,转发到192.168.0.60:10808,此接口是局域网中代理软件提供的
forward-socks5 / 192.168.0.60:10808 .
#
#      Note that if you got Tor through one of the bundles, you may
#      have to change the port from 9050 to 9150 (or even another
#      one). For details, please check the documentation on the Tor
#      website.
#
#      The public Tor network can't be used to reach your local
#      network, if you need to access local servers you therefore
#      might want to make some exceptions:
#
#        forward         192.168.*.*/     .
#        forward            10.*.*.*/     .
#        forward           127.*.*.*/     .
#
forward         192.168.*.*/     .
forward            10.*.*.*/     .
forward           127.*.*.*/     .
forward           172.24.*.*/    .
#
......
#  Examples:
#
#      forwarded-connect-retries 1
#
forwarded-connect-retries  1
#
......
重启代理软件并设置为开机自启:
noone@noone-virtual-machine:~$ sudo systemctl enable privoxy
noone@noone-virtual-machine:~$ sudo systemctl restart privoxy
在.bashrc文件末尾追加环境变量配置,使得命令行工具产生的流量转发给Privoxy软件进行处理:
noone@noone-virtual-machine:~$ vim ~/.bashrc
export ftp_proxy="127.0.0.1:8118"
export http_proxy="127.0.0.1:8118"
export https_proxy="127.0.0.1:8118"
export no_proxy="localhost,127.0.0.1,10.0.0.0/8,172.16.0.0/12,172.24.0.0/12,192.168.0.0/16,172.17.0.1,
.svc.cluster.local"
命令行工具流量代理的效果测试:
noone@noone-virtual-machine:/tmp$ wget www.google.com
--2021-03-24 10:21:45--  http://www.google.com/
Connecting to 127.0.0.1:8118... connected.
Proxy request sent, awaiting response... 200 OK
Length: 12823 (13K) [text/html]
Saving to: ‘index.html’

index.html                                                  100%[=====>]  12.52K  --.-KB/s    in 0s

2021-03-24 10:21:47 (187 MB/s) - ‘index.html’ saved [12823/12823]

noone@noone-virtual-machine:/tmp$
- 修改NSSwitch配置文件指定行:
noone@noone-virtual-machine:~$ cat /etc/nsswitch.conf
# /etc/nsswitch.conf
#
# Example configuration of GNU Name Service Switch functionality.
# If you have the `glibc-doc-reference' and `info' packages installed, try:
# `info libc "Name Service Switch"' for information about this file.
……

hosts:          files dns

……
noone@noone-virtual-machine:~$
4 安装步骤
此次为AIO模式部署,因此所有的OpenStack组件的容器都部署在同一节点,由于网络环境影响,即使配置了代理也会经常有网络抖动、中断,因此在执行脚本过程中若因网络导致失败,可以多重复执行几次。工作目录如下:
noone@noone-virtual-machine:~$ cd openstack/openstack-helm
noone@noone-virtual-machine:~/openstack/openstack-helm$ pwd
/home/noone/openstack/openstack-helm
4.1 部署Kubernetes、Helm
./tools/deployment/developer/common/010-deploy-k8s.sh
./tools/deployment/developer/common/020-setup-client.sh
4.2 部署Ingress Controller
./tools/deployment/component/common/ingress.sh4.3 部署NFS Provisioner
./tools/deployment/developer/nfs/040-nfs-provisioner.sh4.4 部署MariaDB
./tools/deployment/developer/nfs/050-mariadb.sh4.5 部署RabbitMQ
./tools/deployment/developer/nfs/060-rabbitmq.sh4.6 部署Memcached
./tools/deployment/developer/nfs/070-memcached.sh4.7 部署Keystone
编辑此脚本文件,注释掉replace_variables函数的所有调用:
/home/noone/openstack/openstack-helm/tools/deployment/common/get-values-overrides.sh然后,再执行相关脚本:
./tools/deployment/developer/nfs/080-keystone.sh4.8 部署Heat
./tools/deployment/developer/nfs/090-heat.sh4.9 部署Horizon
./tools/deployment/developer/nfs/100-horizon.sh4.10 部署Glance
./tools/deployment/developer/nfs/120-glance.sh4.11 部署OpenvSwitch
./tools/deployment/developer/nfs/140-openvswitch.sh4.12 部署Libvirt
./tools/deployment/developer/nfs/150-libvirt.sh4.13 部署Compute Kit (Nova and Neutron)
./tools/deployment/developer/nfs/160-compute-kit.sh4.14 配置外部网络访问网关
./tools/deployment/developer/nfs/170-setup-gateway.sh4.15 部署结果验证
确保各个OpenStack组件的Pod都达到预期状态,如果有部分容器启动失败,可以借助Kuboard进一步调试。
noone@noone-virtual-machine:~/openstack/openstack-helm$ kubectl -n openstack get deployment
NAME                          READY   UP-TO-DATE   AVAILABLE   AGE
glance-api                    1/1     1            1           8d
glance-registry                1/1     1            1           8d
heat-api                      1/1     1            1           9d
heat-cfn                      1/1     1            1           9d
heat-engine                   1/1     1            1           9d
horizon                       1/1     1            1           9d
ingress                       1/1     1            1           9d
ingress-error-pages            1/1     1            1           9d
keystone-api                  1/1     1            1           9d
mariadb-ingress               2/2     2            2           9d
mariadb-ingress-error-pages    1/1     1            1           9d
memcached-memcached       1/1     1            1           9d
neutron-server                 1/1     1            1           8d
nova-api-metadata             1/1     1            1           8d
nova-api-osapi                 1/1     1            1           8d
nova-conductor                1/1     1            1           8d
nova-consoleauth              1/1     1            1           8d
nova-novncproxy               1/1     1            1           8d
nova-scheduler                1/1     1            1           8d
placement-api                 1/1     1            1           8d
noone@noone-virtual-machine:~/openstack/openstack-helm$
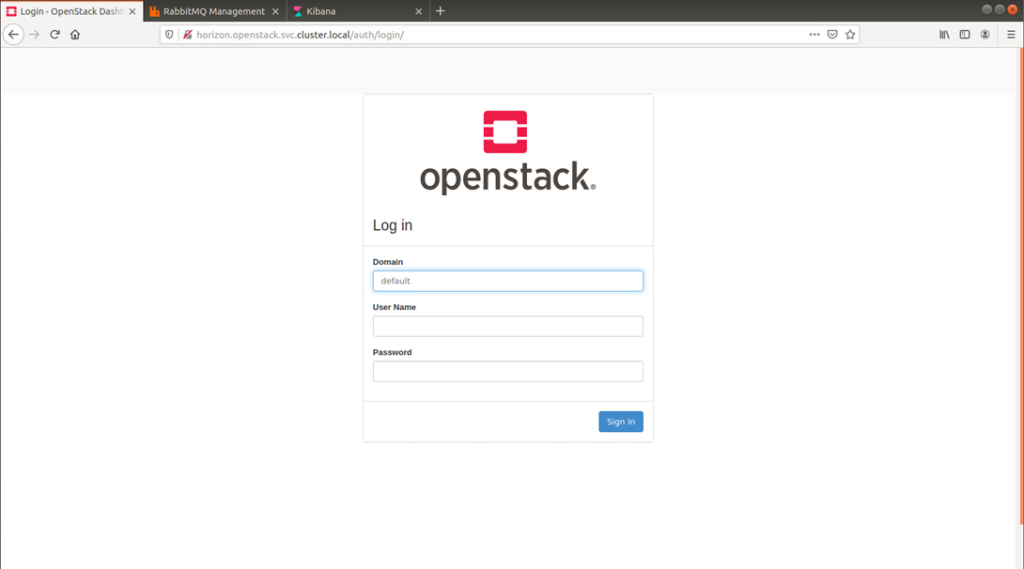
在确认各个容器启动成功后,使用Ingress提供的URL访问OpenStack Horizon。
noone@noone-virtual-machine:~/openstack/openstack-helm$ kubectl -n openstack get ingress
……
horizon        <none>        horizon,horizon.openstack,horizon.openstack.svc.cluster.local
……
为进一步确保OpenStack基础功能运行正常,创建两台虚拟机,进行通讯测试。
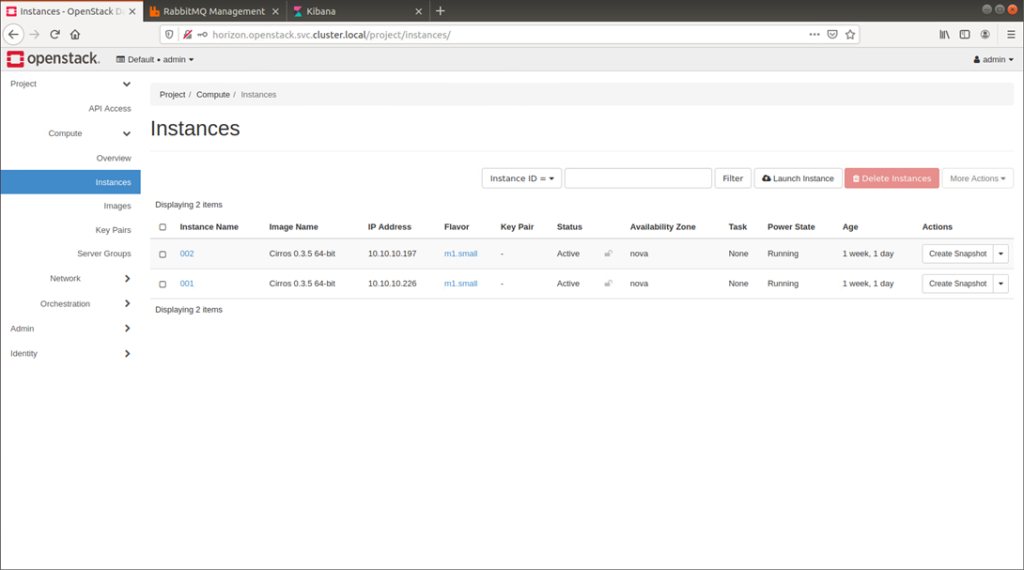
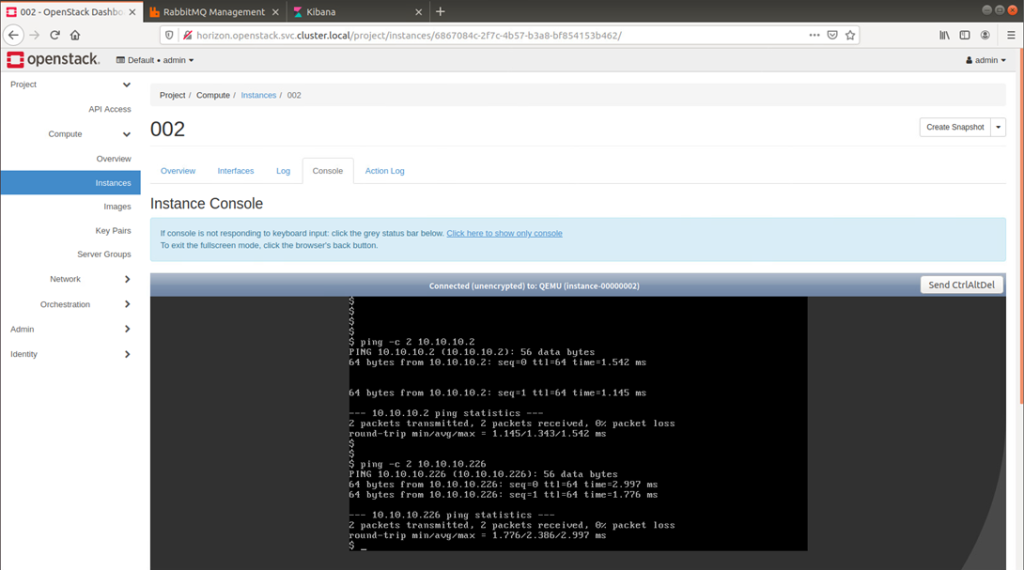
成功创建了两台虚拟机,虚拟机可以正常启动,并在使用VxLAN网络创建的VPC下成功互通,结果符合预期。
5 Kubernetes可视化管理面板安装
在整个部署过程中,会产生各种意料之外的容器错误,为了方便排错,安装可视化管理面板进行日志分析错误定位。
noone@noone-virtual-machine:~/openstack$ vim deploy-kuboard.sh
noone@noone-virtual-machine:~/openstack$ cat deploy-kuboard.sh
#!/bin/bash

sudo docker run -d \
  --restart=unless-stopped \
  --name=kuboard \
  -p 10080:80/tcp \
  -p 10081:10081/udp \
  -p 10081:10081/tcp \
  -e KUBOARD_ENDPOINT="http://192.168.2.233:10080" \
  -e KUBOARD_AGENT_SERVER_UDP_PORT="10081" \
  -e KUBOARD_AGENT_SERVER_TCP_PORT="10081" \
  -v /root/kuboard-data:/data \
  eipwork/kuboard:v3
# 国内可以使用镜像 swr.cn-east-2.myhuaweicloud.com/kuboard/kuboard:v3 ,以更快地完成下载
# 请不要使用 127.0.0.1 或者 localhost 作为内网 IP,默认用户名密码:admin/Kuboard123
noone@noone-virtual-machine:~/openstack$ bash deploy-kuboard.sh
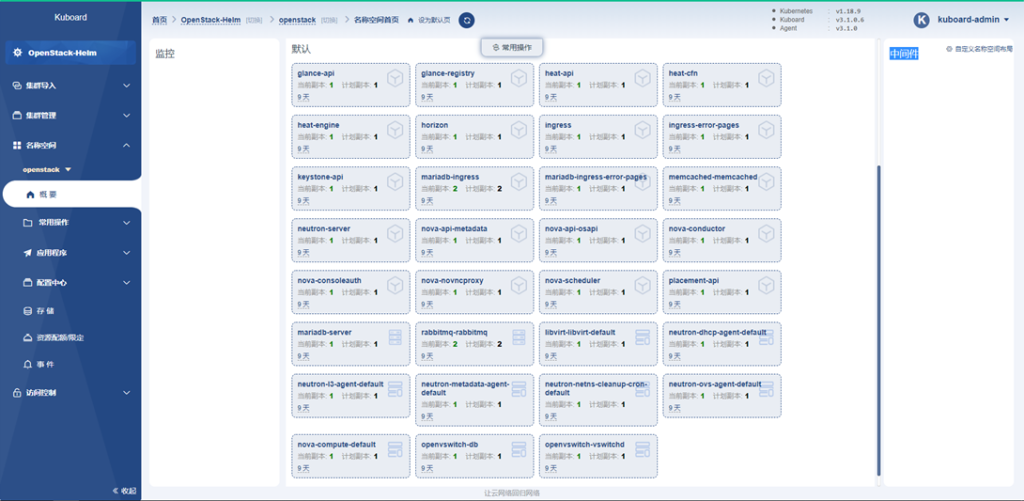
待所有Kuboard容器正常启动后,使用默认用户名密码进行登录,界面如下图所示,集群导入管理等操作不再赘述。

6 参考资料
【2】 External DNS to FQDN/Ingress;
【4】 Fix(script): removes replacement overrides;
更多内容请参考:A-Lab
