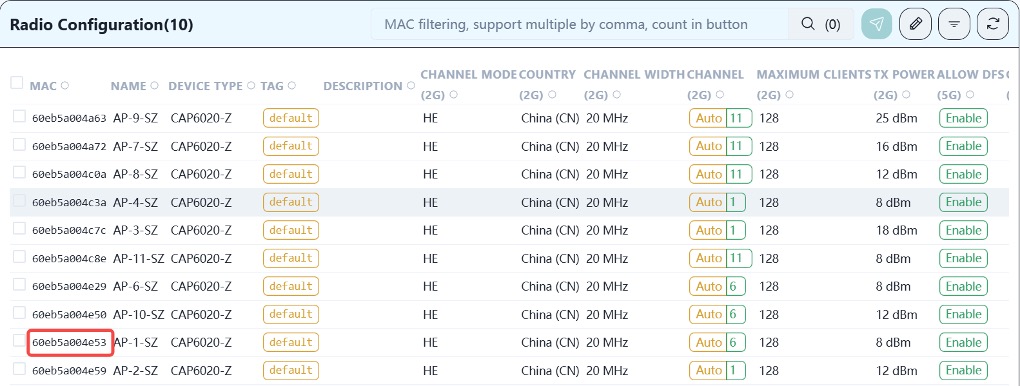
# MAC ADDRESS=$(sonic-cfggen -H -v 'DEVICE METADATA.localhost.mac')
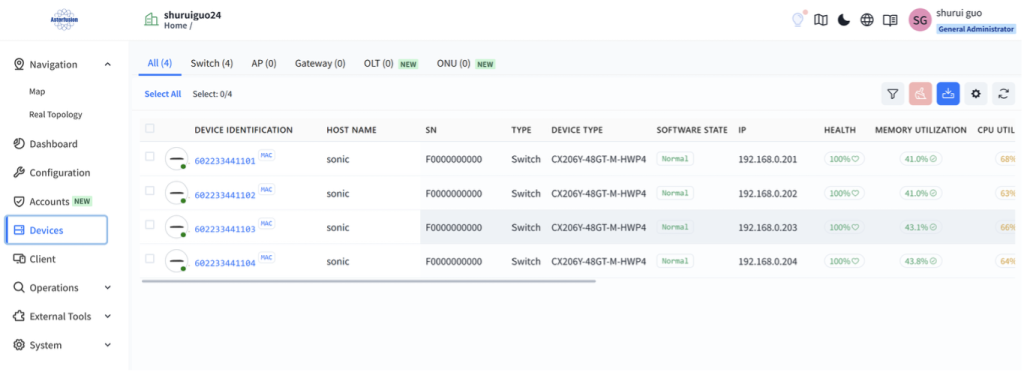
MAC ADDRESS="60:22:33:44:11:01"
$SONIC DB CLI STATE DB HSET 'DEVICE METADATA | localhost' 'mac' "$MAC ADDREE"
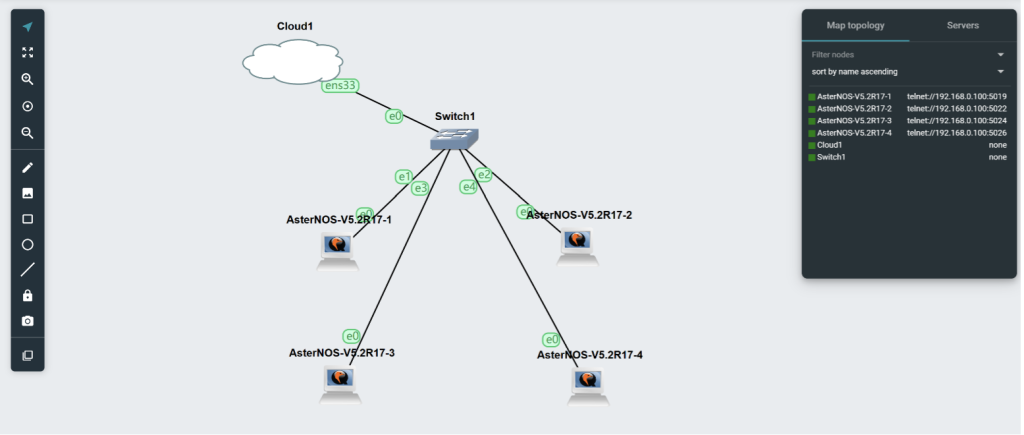
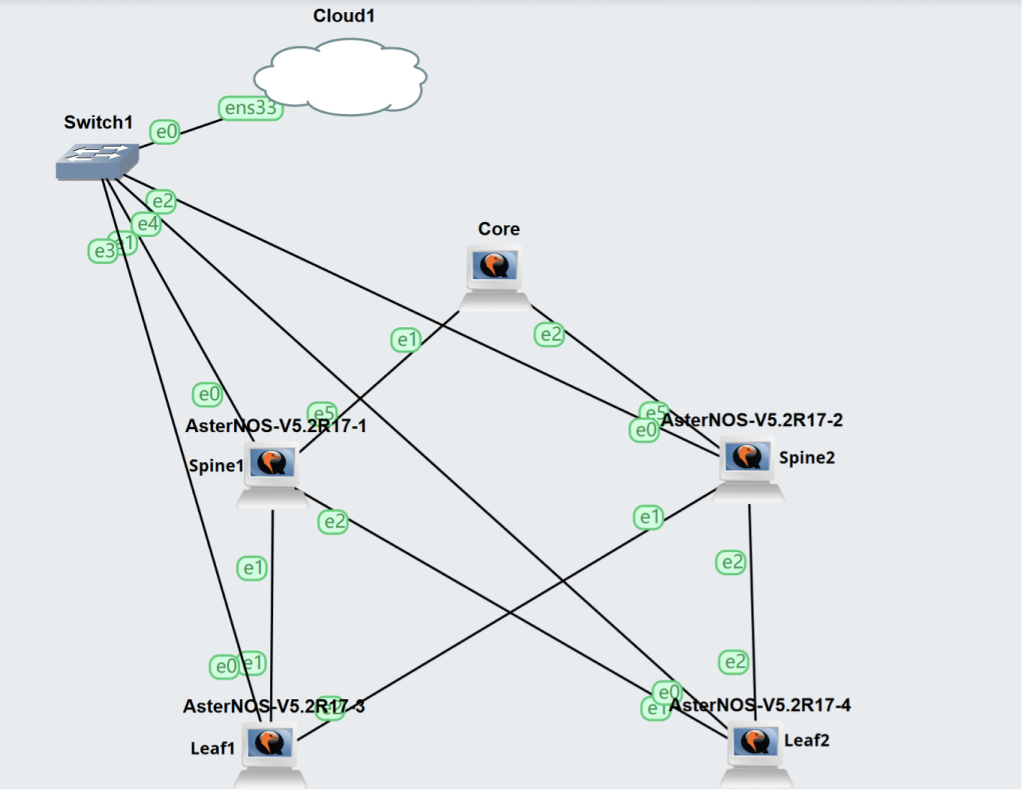
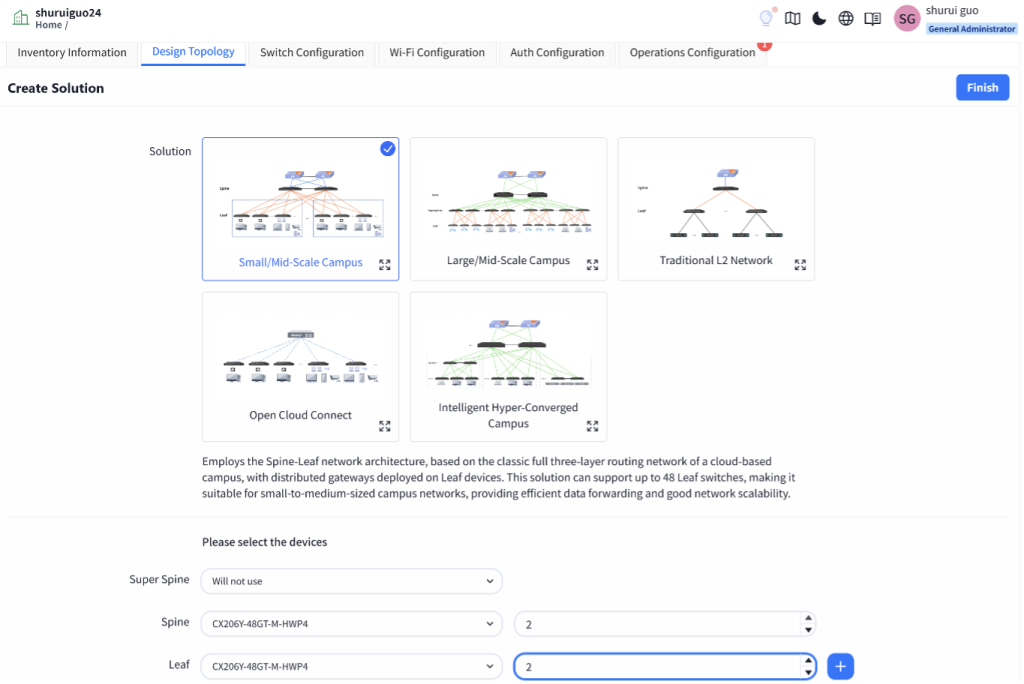
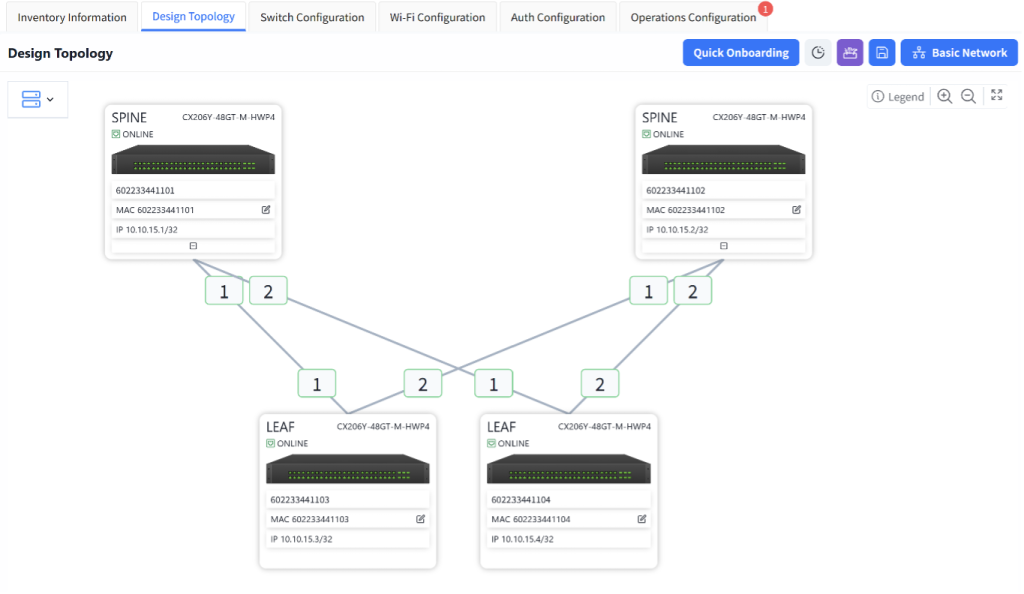
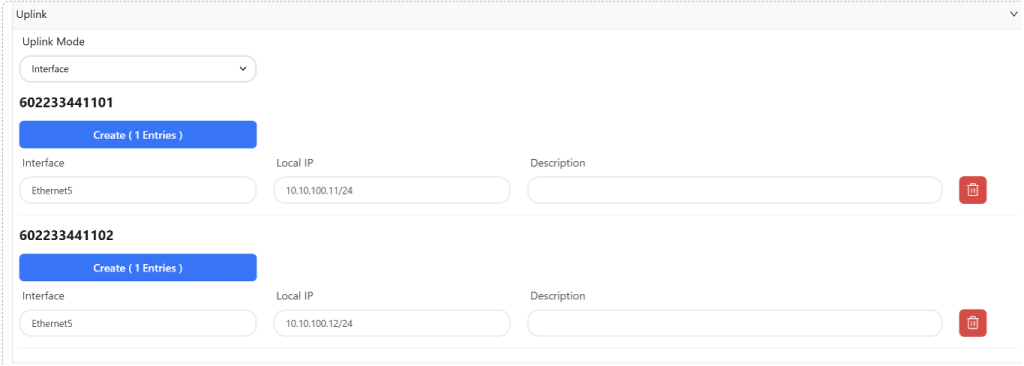
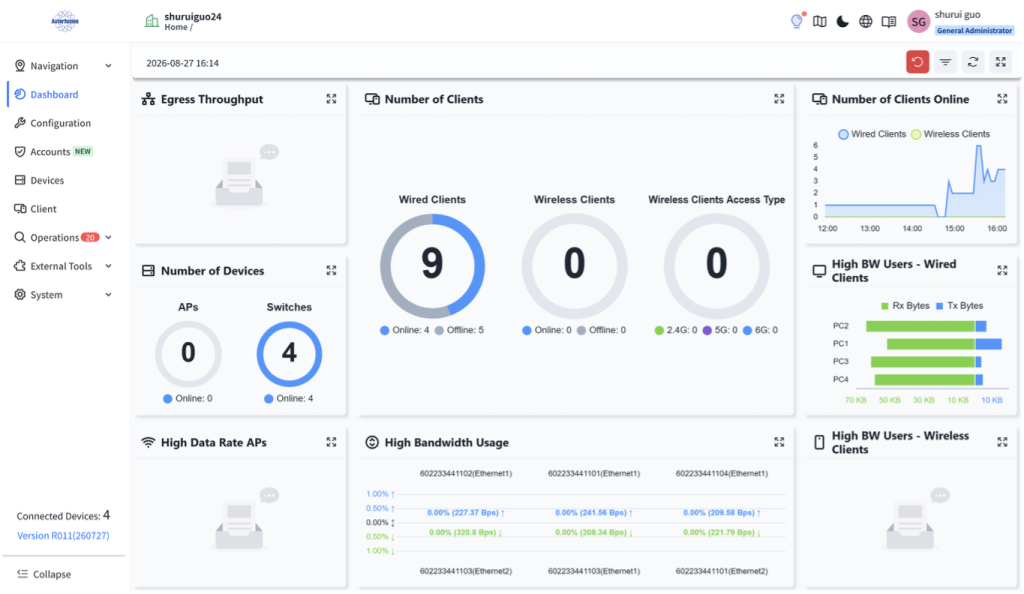
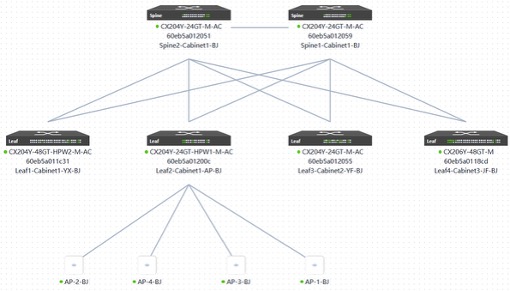
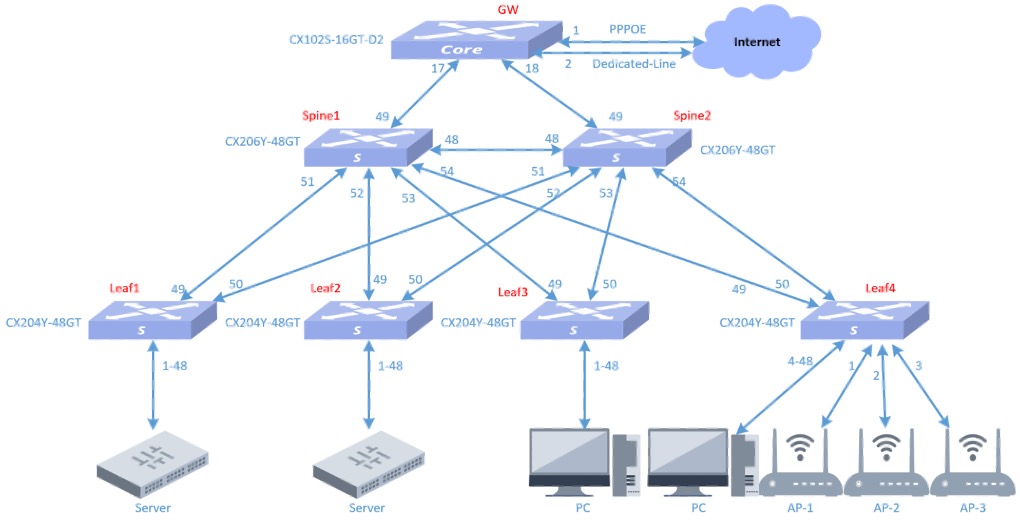
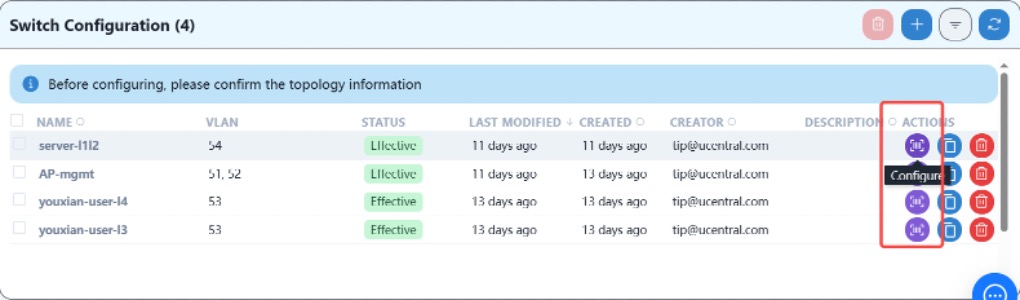
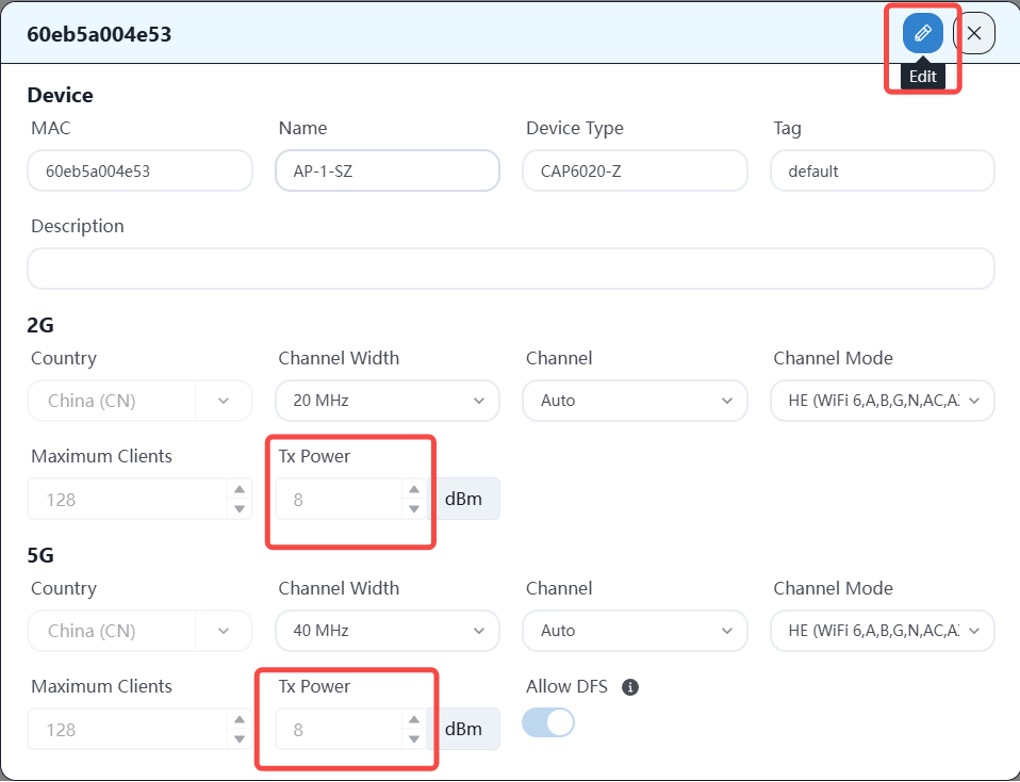
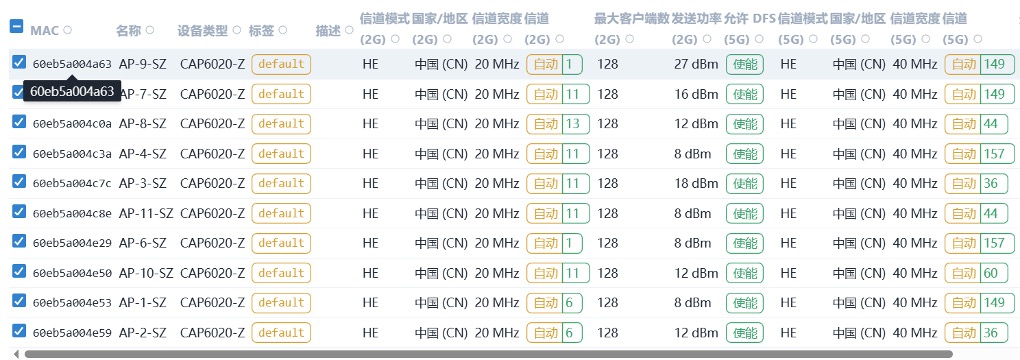
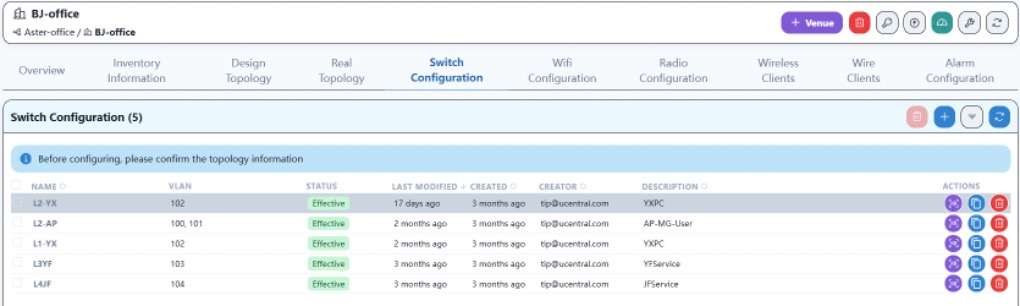
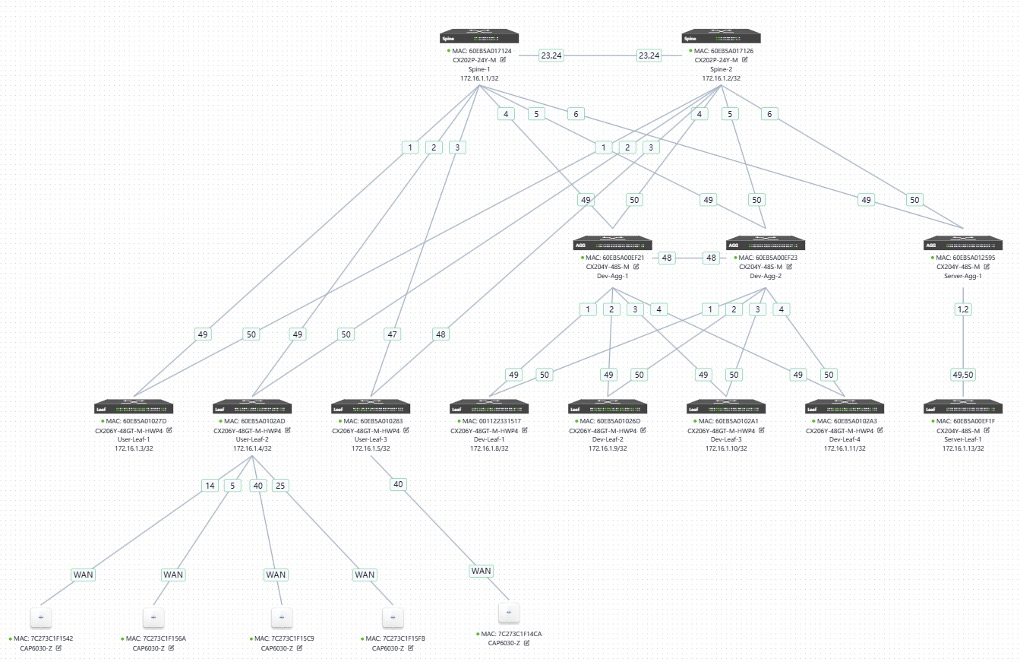
依次配置四台设备,通过show ucentral-client server status命令确定设备已经与控制器成功连接
sonic# show ucentral-client server status
+--------------+-----------+
| ServerIP      | status    |
+==============+===========+
| 52.76.134.89 | connected |
+--------------+-----------+
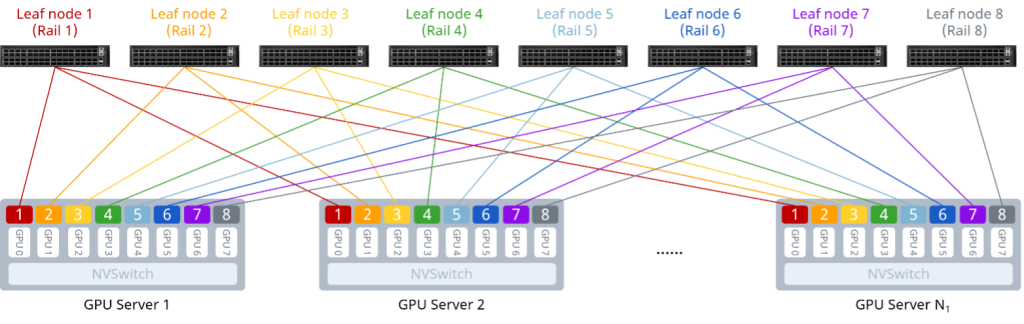
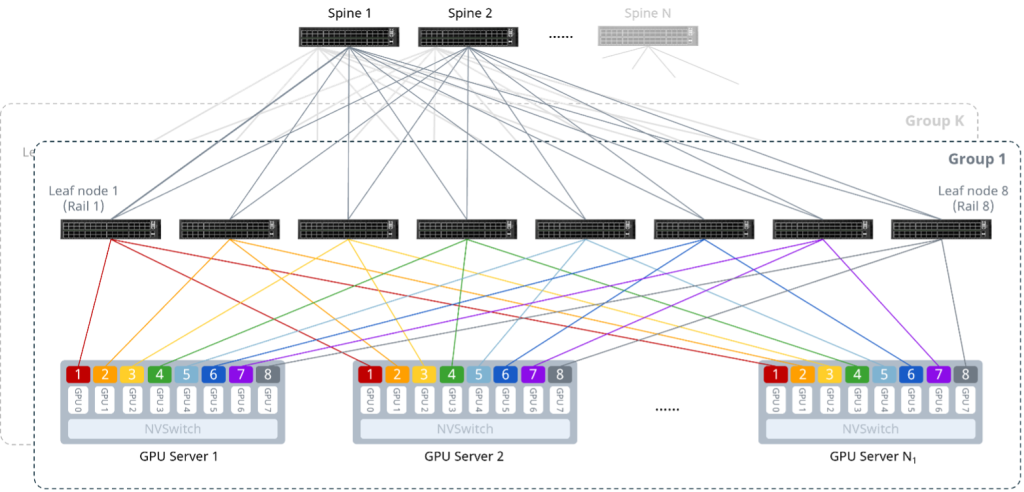
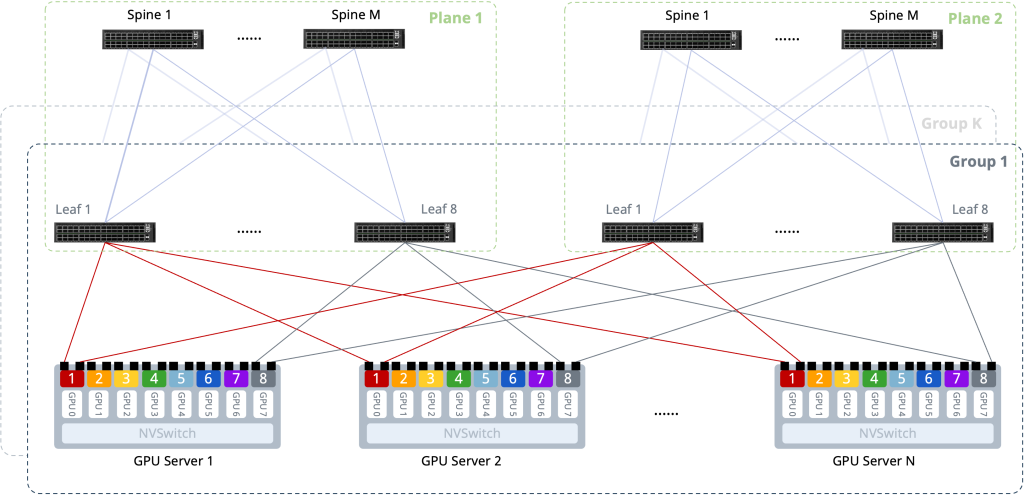
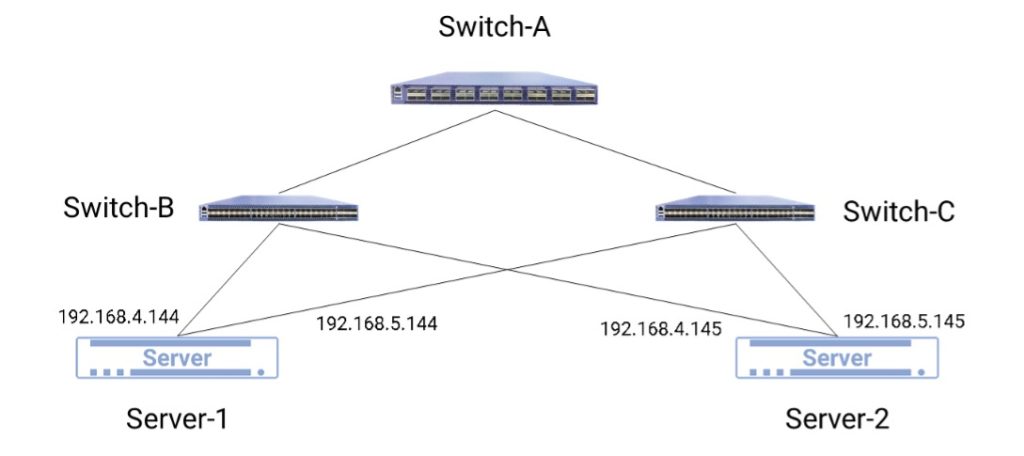
ARS(Adaptive Routing and Switching,自适应路由切换)是一种基于Flowlet(子流)的负载均衡技术。其借助ASIC提供的硬件ALB(Auto-Load-Balancing)[2]能力,能够在减少乱序的同时实现近乎逐包负载分担的均衡性。该技术通过将哈希值相同的数据流按一定时间间隔分割成一系列Flowlet,再通过实时感知端口的带宽利用率、队列深度等链路质量指标,将Flowlet主动分配至空闲路径,从而提升整体网络带宽利用率。
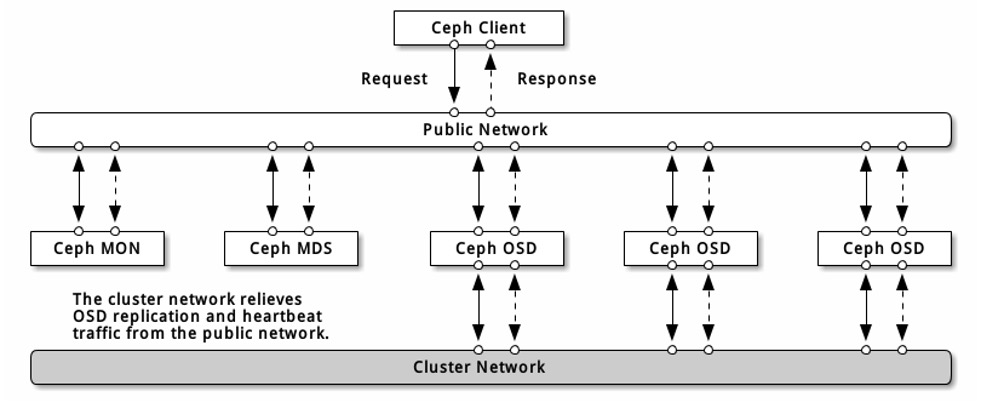
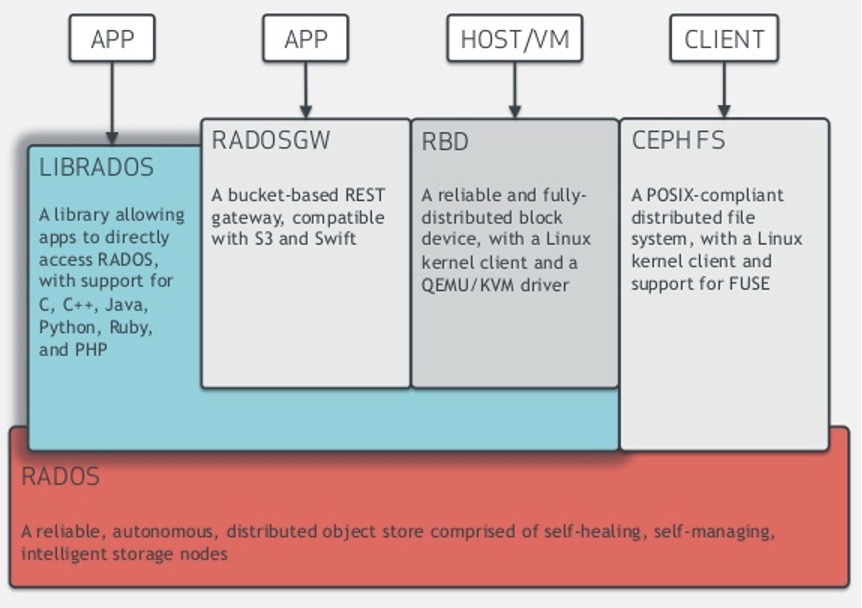
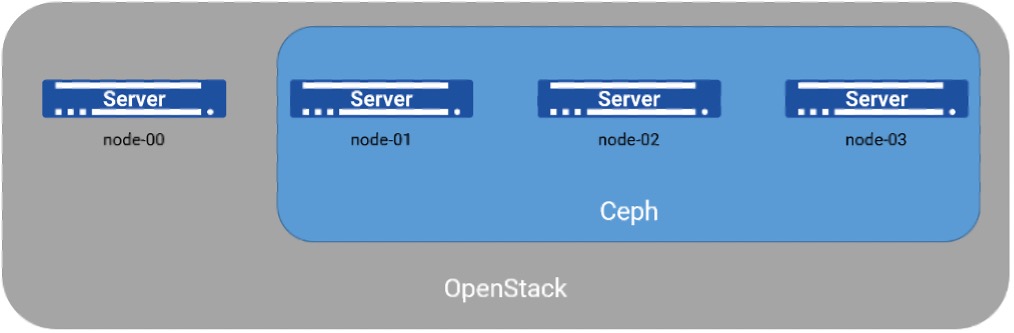
Ceph是一个目前非常流行且应用广泛的SDS(Software Defined Storage)解决方案。Ceph官网上用这句话简明扼要地对其进行定义:“Ceph is a unified, distributed storage system designed for excellent performance, reliability and scalability.” 翻译为中文:“Ceph是一种为优秀的性能、可靠性和可扩展性而设计的统一的、分布式的存储系统。”这句话可以作为理解Ceph系统设计思想和实现机制的基本出发点。在这个定义中,应当特别注意“存储系统”这个概念的两个修饰词,即“统一的”和“分布式的”。
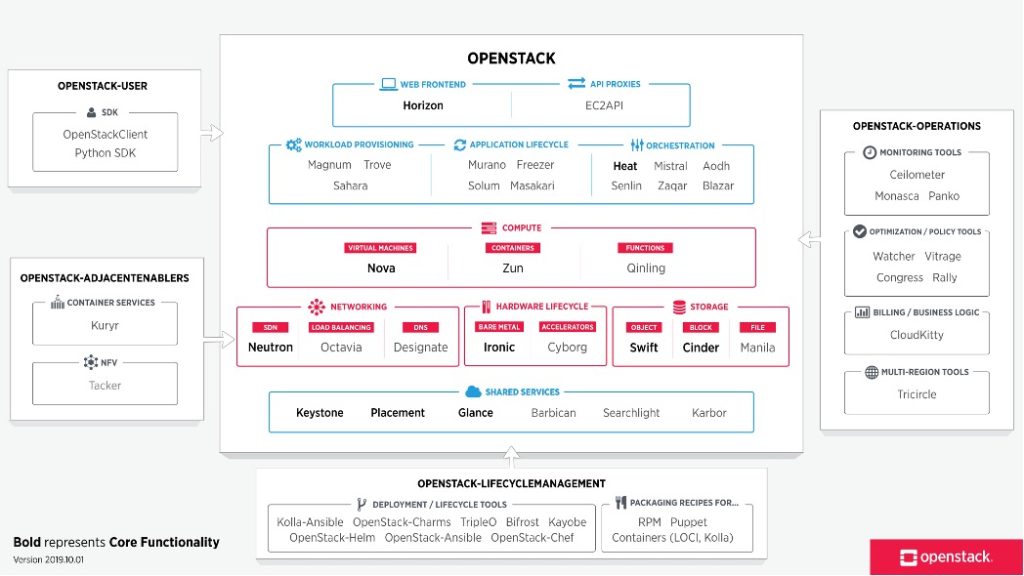
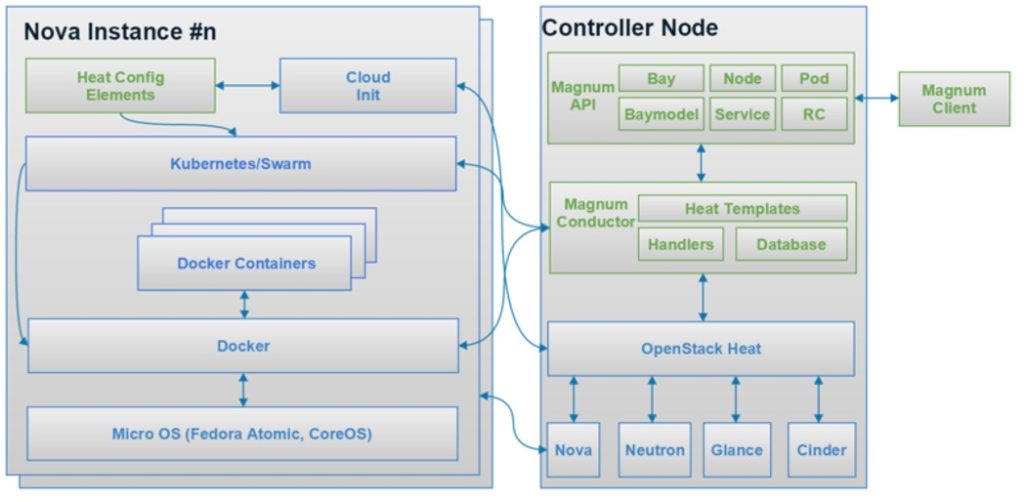
简单总结:Magnum自身作为一套 API 框架,本身调用其它的容器管理平台的 API 来实现功能。目前支持的后端包括 Kubernetes、Swarm和Mesos。
如果说 Nova 是一套支持不同 Hypervisor 虚拟机平台的API 框架,那么 Magnum 则是支持不同容器机制的 API 框架。
4 安装步骤
[root@controller ~] 表示在控制节点上执行
[root@compute ~] 表示在计算节点上执行
4.1 创建数据库
创建数据库并授权:
[root@controller ~]# mysql -uroot -p
MariaDB [(none)]> CREATE DATABASE magnum;
MariaDB [(none)]> GRANT ALL PRIVILEGES ON magnum.* TO magnum@'localhost' \
  IDENTIFIED BY 'magnum';
MariaDB [(none)]> GRANT ALL PRIVILEGES ON magnum.* TO magnum@'%' \
  IDENTIFIED BY 'magnum';
注:帐号密码根据自己的情况修改
4.2 创建openstack用户、服务凭据、API端点
在安装和配置Magnum之前,必须创建用户、服务凭据和API端点:
[root@controller ~]# . admin-openrc
[root@controller ~]# openstack user create --domain default --password-prompt magnum
[root@controller ~]# openstack role add --project service --user magnum admin
[root@controller ~]#openstack service create --name magnum \
  --description "OpenStack Container Infrastructure Management Service" \
  container-infra
[root@controller ~]#openstack endpoint create --region RegionOne \
  container-infra public http://controller:9511/v1
[root@controller ~]#openstack endpoint create --region RegionOne \
  container-infra internal http://controller:9511/v1
[root@controller ~]#openstack endpoint create --region RegionOne \
  container-infra admin http://controller:9511/v1
Magnum需要身份服务中的其他信息来管理COE群集
创建 magnum域
[root@controller ~]# openstack domain create --description "Owns users and projects \
  created by magnum" magnum
在magnum域中创建magnum_domain_admin用户
[root@controller ~]# openstack user create --domain magnum --password-prompt \
  magnum_domain_admin
添加admin角色到 magnum域 中的magnum_domain_admin用户
[root@controller ~]# openstack role add --domain magnum --user-domain magnum --user \
  magnum_domain_admin admin
4.3 在controller节点上安装magnum服务
创建用户、组:
[root@controller ~]#groupadd --system magnum
[root@controller ~]#useradd --home-dir "/var/lib/magnum" \
      --create-home \
      --system \
      --shell /bin/false \
      -g magnum \
      magnum
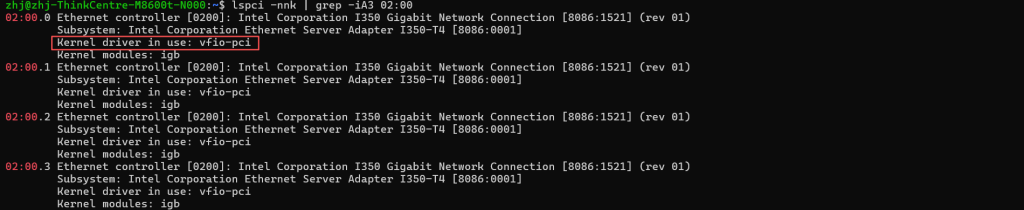
# 1. Edit the GRUB configuration file
sudo nano /etc/default/grub
# 2. Find the line starting with GRUB_CMDLINE_LINUX_DEFAULT and add "intel_iommu=on iommu=pt" inside the quotes.
 GRUB_CMDLINE_LINUX_DEFAULT="quiet splash intel_iommu=on iommu=pt"
# 3.  After saving the file, update the GRUB configuration
sudo update-grub
# Tell the system that devices with ID 8086:1521 should be managed by vfio-pci
echo "options vfio-pci ids=8086:1521" | sudo tee /etc/modprobe.d/vfio.conf
# Prevent Ubuntu from loading the default 'igb' driver for this NIC to avoid conflicts
echo "blacklist igb" | sudo tee /etc/modprobe.d/blacklist-igb.conf
C. 强制预加载 VFIO 模块:编辑 /etc/initramfs-tools/modules 文件,在末尾添加以下行:
sudo virt-install \
--name AsterNOS \
--virt-type kvm \
--memory 8192 \
--vcpus 4 \
--cpu host-passthrough \
--disk path=/var/lib/libvirt/images/sonic-vpp.img,bus=virtio \ # Please replace this with the actual path to your image file
--import \
--os-variant debian11 \
--network none \
--host-device 02:00.1 \
--host-device 02:00.2 \
--host-device 02:00.3 \
--host-device 02:00.0 \
--nographics
设置虚拟机开机自启:成功创建虚拟机后,在主机上打开新终端并运行以下命令,将其设置为开机自动启动:
sudo virsh autostart AsterNOS
4.6 访问并配置 AsterNOS-VPP 虚拟机
无论您采用哪种方式启动虚拟机,后续配置步骤完全一致。
访问虚拟机控制台:
若使用方式 A(QEMU),虚拟机控制台已显示在当前终端中
若使用方式 B(libvirt),您可随时通过主机终端执行以下命令连接至虚拟机控制台:
sudo virsh console AsterNOS
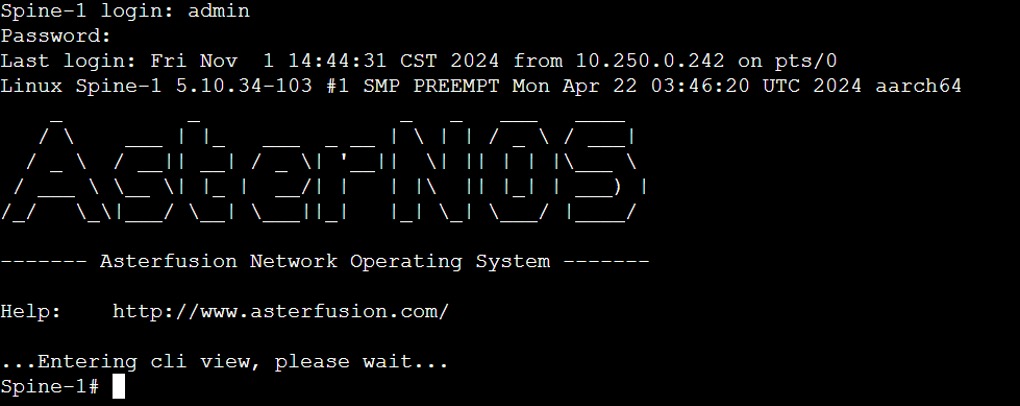
登录系统并进入配置模式:
在登录提示符处使用默认凭据访问系统:
用户名:admin
密码:asteros
分步配置与验证:
步骤 A:启动命令行界面并进入配置模式
sonic-cli
configure terminal
步骤B:配置WAN接口
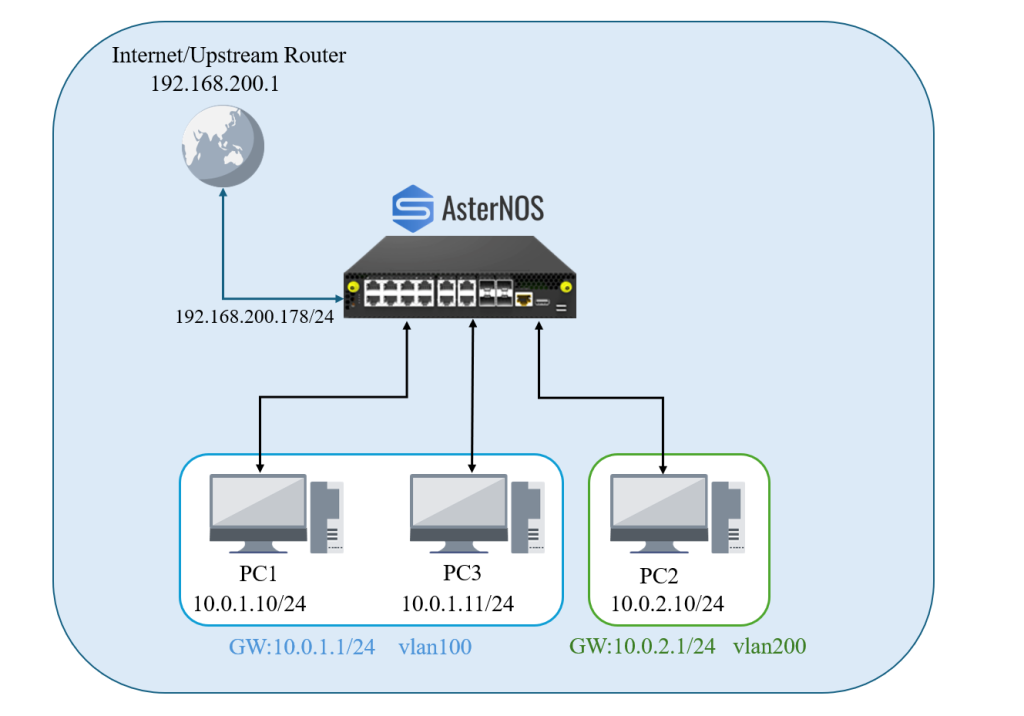
interface ethernet 1
  description WAN_Port
  ip address 192.168.200.178/24
  # Assign this interface to NAT zone 1. By convention, the outside (WAN) interface is a non-zero zone, and inside interfaces are zone 0.
  nat-zone 1
exit
# Configure the default route to point to the upstream router
ip route 0.0.0.0/0 192.168.200.1
# Enable NAT globally
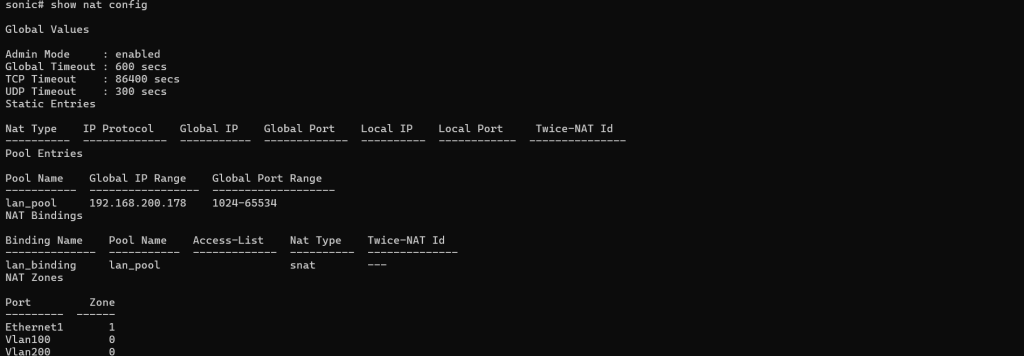
nat enable
# Create a NAT pool named 'lan_pool' using the router's public IP
nat pool lan_pool 192.168.200.178
# Bind the pool to a policy named 'lan_binding' to apply NAT to all traffic crossing zones
nat binding lan_binding lan_pool
步骤F:保存配置
write
步骤G:验证配置
show ip interfaces
show ip route
show vlan summary
show nat config
cd /opt/controller/controller_V1.0_R07/wlan-cloud-ucentral-deploy/docker-compose/
docker-compose up -d
参数说明:
-d :表示后台执行
up :表示启动控制器
down :表示关闭控制器
完全清除重新安装
注:无需保留原有数据清除重新安装。以下为清除方法,安装方法同“初次安装”。
docker-compose down
docker image ls
docker rmi 手动列出IMAGE ID
docker volume ls
docker volume rm openwifi_kafka_data openwifi_postgresql_data openwifi_zookeeper_data openwifi_zookeeper_datalog
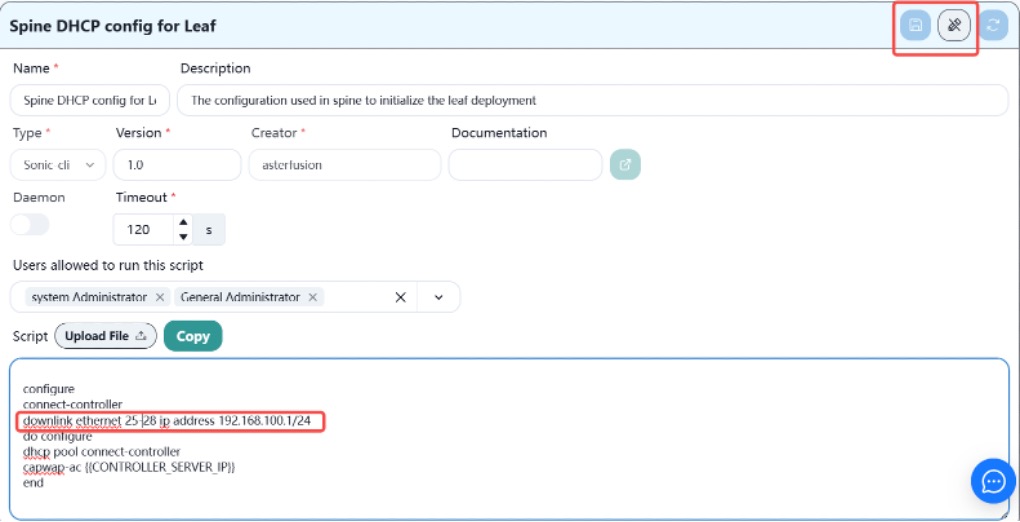
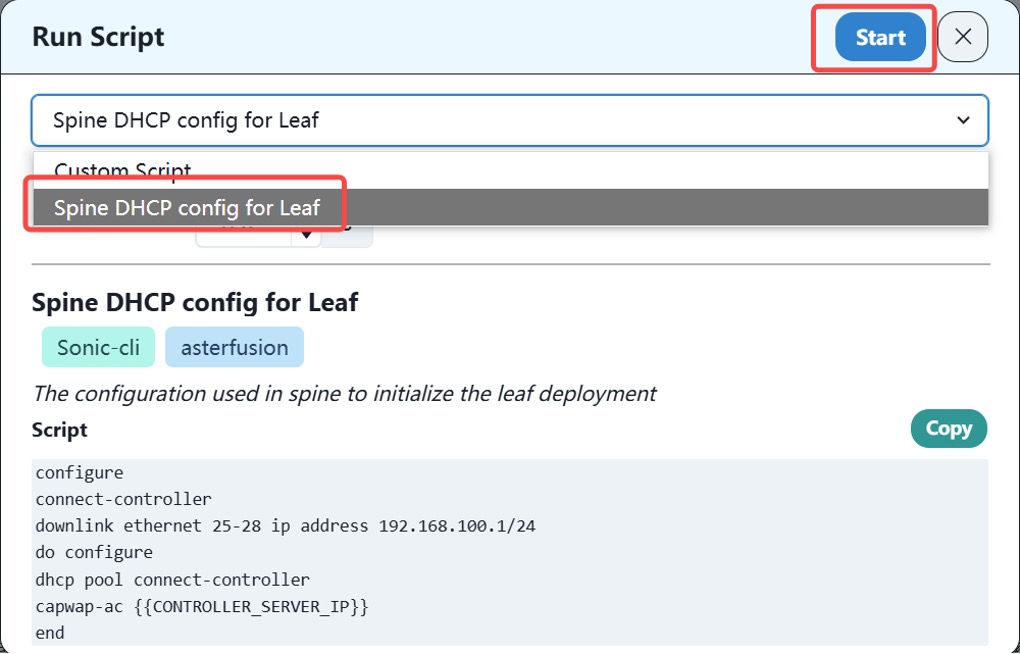
configure
connect-controller
downlink ethernet 1,5,9,13 ip address 172.22.55.1/24
do configure
dhcp pool connect-controller
capwap-ac {{CONTROLLER_SERVER_IP}}
end
configure
connect-controller
downlink ethernet 21 ip address 172.22.55.1/24
do configure
dhcp pool connect-controller
capwap-ac {{CONTROLLER_SERVER_IP}}
end